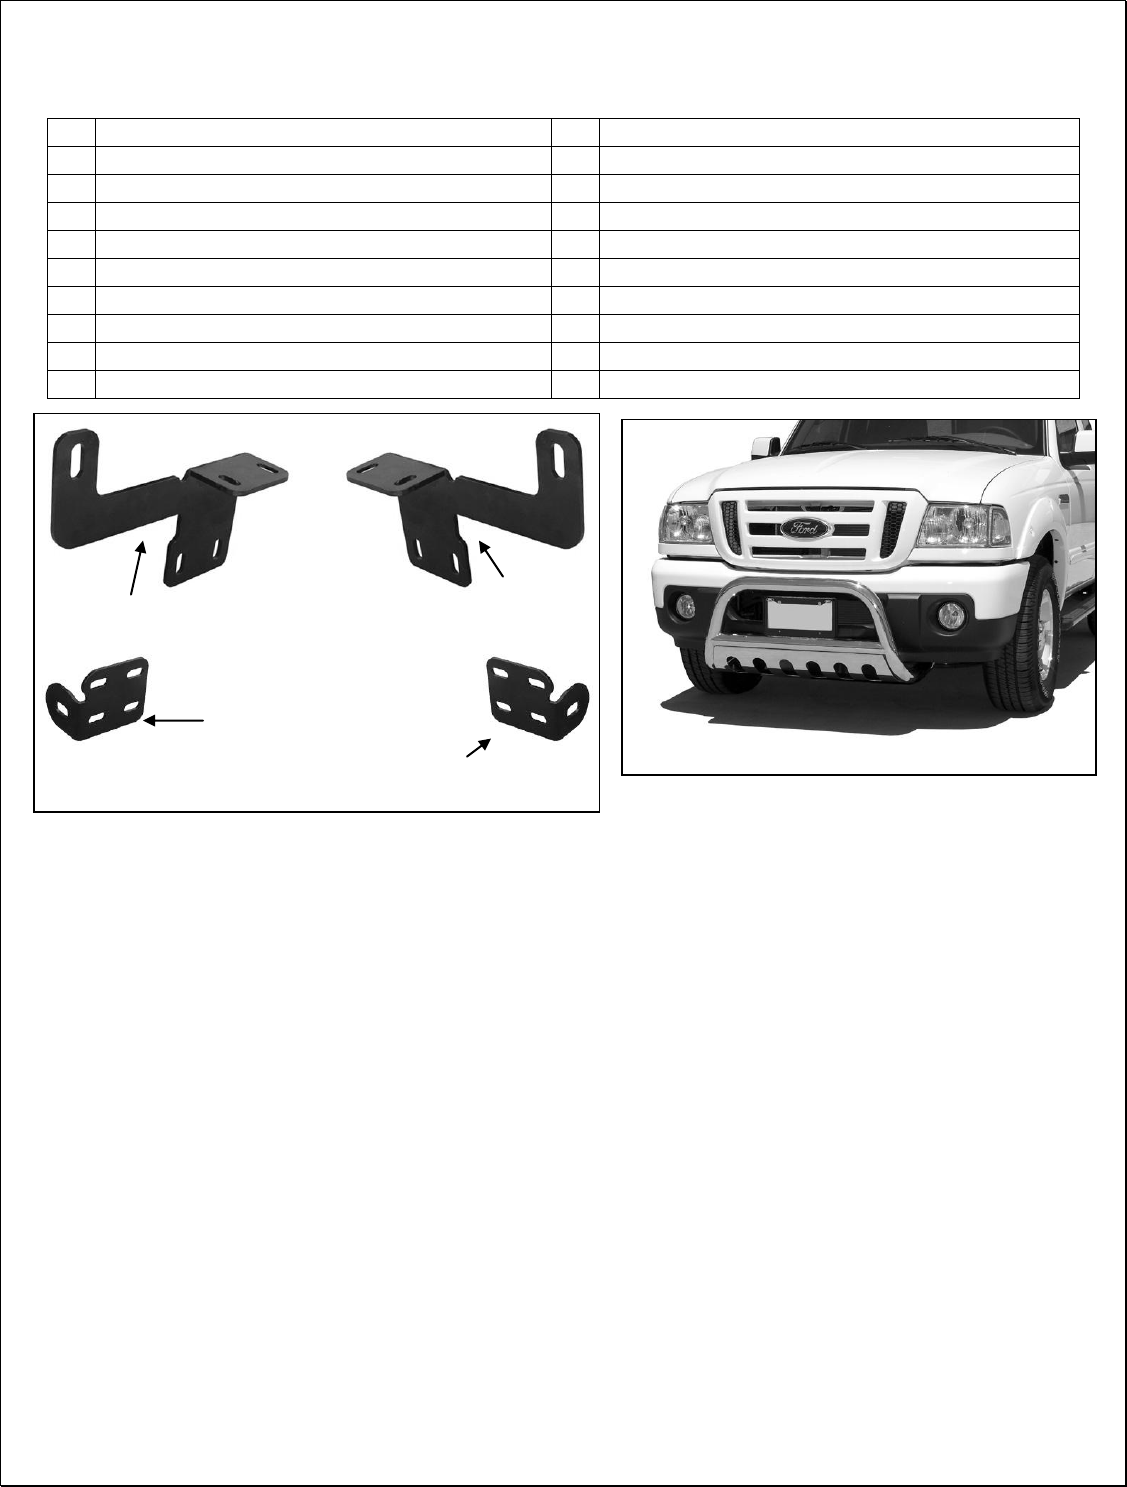
BULL BAR
1998-2011 FORD RANGER
Page 1 of 4 12/2/2011REV1(DP)
PARTS LIST:
Driver/Left Frame Mounting Bracket
10-1.5mm x 35mm Hex Bolts
Passenger/Right Frame Mounting Bracket
10mm x 27mm OD x 3mm Flat Washers
Driver/Left Mounting Bracket
Passenger/Right Mounting Bracket
12-1.75mm x 110mm Hex Bolts
8-1.25mm x 25mm Special Self Tapping Flange Bolts
12-1.75mm x 50mm Hex Bolts
8-1.25mm x 55mm Double Sided Studs W/Nut
12mm x 44mm OD x 4mm Large Flat Washers
8mm x 24mm OD x 2mm Flat Washers
12mm x 32mm OD x 3mm STD Flat Washers
PROCEDURE:
REMOVE CONTENTS FROM BOX. VERIFY ALL PARTS ARE PRESENT. READ INSTRUCTIONS
CAREFULLY BEFORE STARTING INSTALLATION. FACTORY SKID PLATE MUST BE REMOVED OR
MODIFIED FOR INSTALLATION. NOTE: It may be necessary to remove/relocate front license plate and
license plate bracket. It is not required, but strongly recommended. If local/state law requires a license
plate, license plate relocation kit is available.
1. Start the installation on the driver side, front of the vehicle. If vehicle is equipped with a plastic air box,
remove the airbox, (Figure 1). Select the driver side Frame Mounting Bracket. Hold the Bracket in
position against the outside of the frame channel. Insert (1) 12mm x 110mm Hex Bolt with (1) 12mm x
32mm Flat Washer sideways through the Mounting Bracket and frame, (Figure 2). Thread (1) 12mm x
44mm Large Flat Washer, (1) 12mm Lock Washer and (1) 12mm Hex Nut onto the end of the 12mm x
110mm Hex Bolt, (Figure 3). Do not tighten hardware at this time.
2. Line up the (2) slots in the bottom of the Bracket with the (2) factory holes in the bottom of the frame.
a. 1998-2009 vehicles without plastic airbox: Slowly thread (2) 8mm x 25mm Self Tapping
Flange Bolts into the factory holes in the frame, (Figure 4). Do not tighten hardware at this time.
Repeat this Step for passenger side Frame Bracket installation. IMPORTANT! Do not over-
tighten the Bracket hardware or damage to the frame may result.
b. 2010-11 vehicles with plastic airbox or factory skid plate (must be removed): The forward
hole is not threaded; the rear hole is threaded for a hex bolt and was used to hold the air box or
skid plate in place. Slowly thread the (1) 8mm x 25mm Self Tapping Flange Bolt into the forward
unthreaded hole in the frame, (Figure 5A). Do not tighten hardware. Thread (1) 8-1.25mm x
50mm Double Sided Stud with (1) 8mm Flat Washer and (1) 8mm Lock Washer into the rear
threaded hole, (Figure 5A & 5B). NOTE: Installation of the 8mm Double Sided Stud will require
Passenger/Right Side
Frame Mounting Bracket
Driver/Left Side Frame
Mounting Bracket
Driver/Left Side
Mounting Bracket
Passenger/Right Side
Mounting Bracket
Comments to this Manuals